It's time to improve this space
I’ve now been working remotely for 13 out of my 26 years working (it’s crazy to write that!). Over the last year, I’ve been collecting various bits of new equipment to create a space for quality work of any sort. In particular, I’ve wanted to improve the audio and video capabilities - not just the ability to edit, but better audio monitoring, livestreaming capabilities, lighting and a better camera.
Now that I’m situated and the studio is fairly dialed in, I can get to work faster, work with higher fidelity and consistency. Simply having a door I can close also means that we can leverage the rest of our downstairs space (a big open areas) for other activities like working out or watching movies, without disturbing each other (as you can imagine in a full house during a pandemic, a little privacy goes a long way).
The Inspiration
Caleb Pike’s excellent DSLR Video Shooter videos inspired me to think about a more flexible & powerful setup. While it looks a bit crazy, it is very solid and does what I need. Great channel for all things video.
The Space
While I already had a good start when we moved to our house 6 years ago, I wanted a space that would look better on camera. I updated the lighting, the artwork, and the sound absorbing panels.
As the amount of equipment has risen, I also wanted to mount more of it to the walls, which I did for speakers (well, sadly, just one because of the weird shape of this converted kitchen, which I want to retain the capability to revert to in the future if needed). I also mounted a simple HDMI 1080p display to the wall on a swing arm for the ATEM Mini Pro multi-view output.
Taking a break from the green screen
When I moved out of my office space to another corner of our basement area (a great spot with good light from a window), I set up a DIY green screen which you can see the setup for in this video.
It was fun and I would often put up a relevant image for whatever customer call I was on (pet food: dogs; construction: tools; car industry? Open roads, etc). It’s a small thing that endears you to the customer right off the bat without having to say anything).
Over time, it becomes One More Thing to set up and dial in (because of the variable lighting from the window, and the computer gets rebooted often). While I may set up a chroma key screen in the new space at some point, for now I’m going au naturel with just some simple lighting and art in the background.
Audio hardware
B&H is a legendary AV and technology retailer in NYC. I’ve gone to them for years for camera gear, and they have built up enormous trust in the creative industries. They shipped me most of the important tech I’ll be depending on daily for the next few years.
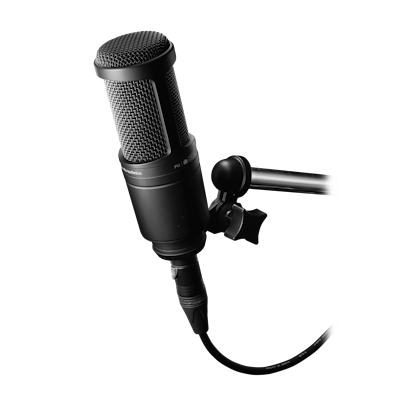 Another helpful point that made choosing Buzzsprout easy was that they offered a 3 month coupon for it with the Audio-Technica AT2035 Cardioid Condenser Mic I bought.
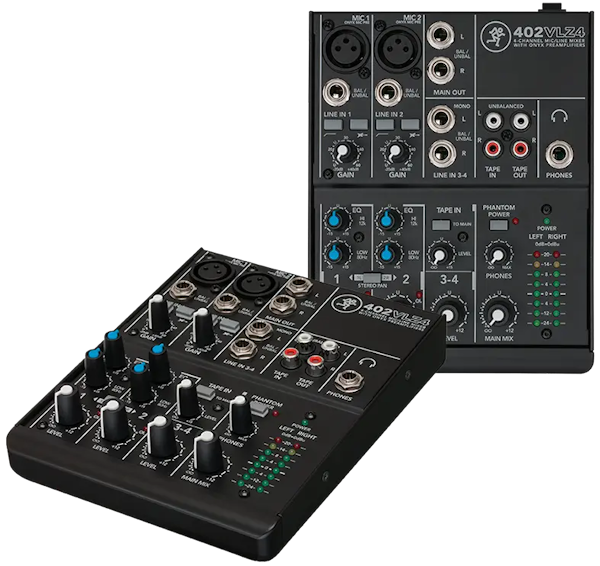
I also added a Mackie 402VLZ4 4-Channel Ultra-Compact Mixer to be an upstream input for the ATEM Mini Pro. Very rugged, small, and reliable.
The hardware investments are super durable and will be useful for years to come. The AT condenser mic is very precise and built like a tank.
Klipsch Reference Monitors
I stumbled on a pair of these Klipsch R-51M monitors at nearly half off at the local Best Buy. I grabbed them like a wild animal, because 1.) they’re legendary for their sound and precision, and 2.) they’re gorgeous. It was going to be a big step up from my tiny Micca bookshelf speakers.
Video improvements
I’ve long dreamed of having a true DSLR to use for meetings, with manual controls, interchangeable lenses, and a higher-quality sensor. I’ve used a Logitech C900 for many years with their control software, but it’s super fiddly and the Mac version, for some reason, gives extremely high-contrast output. Comparing it on PC shows a much smoother image, which makes it clear that it’s a driver issue. It started dropping the settings mid-call recently, so it was another impetus to move to the DSLR.
I tried running the Magic Lantern DSLR firmware on some older Canon cams I have like the T5i; while I was able to make it work for a few minutes, it tended to overheat, and it was not usable in practice. So what was the cheapest decent DSLR I could get for this job?
I would have loved to go Sony at this point (I still might*), the a6400 model is the minimum that would have been worth investing in for robust video capabilities - and it starts at $800-$900 street price, just for the body. A lens kit would be necessary on top of that, and that was feeling like too much of a hit just to get better meeting & webinar videos.
*2023 Update: that is the plan for my “real” camera setup. I’m going all Sony when budget permits.
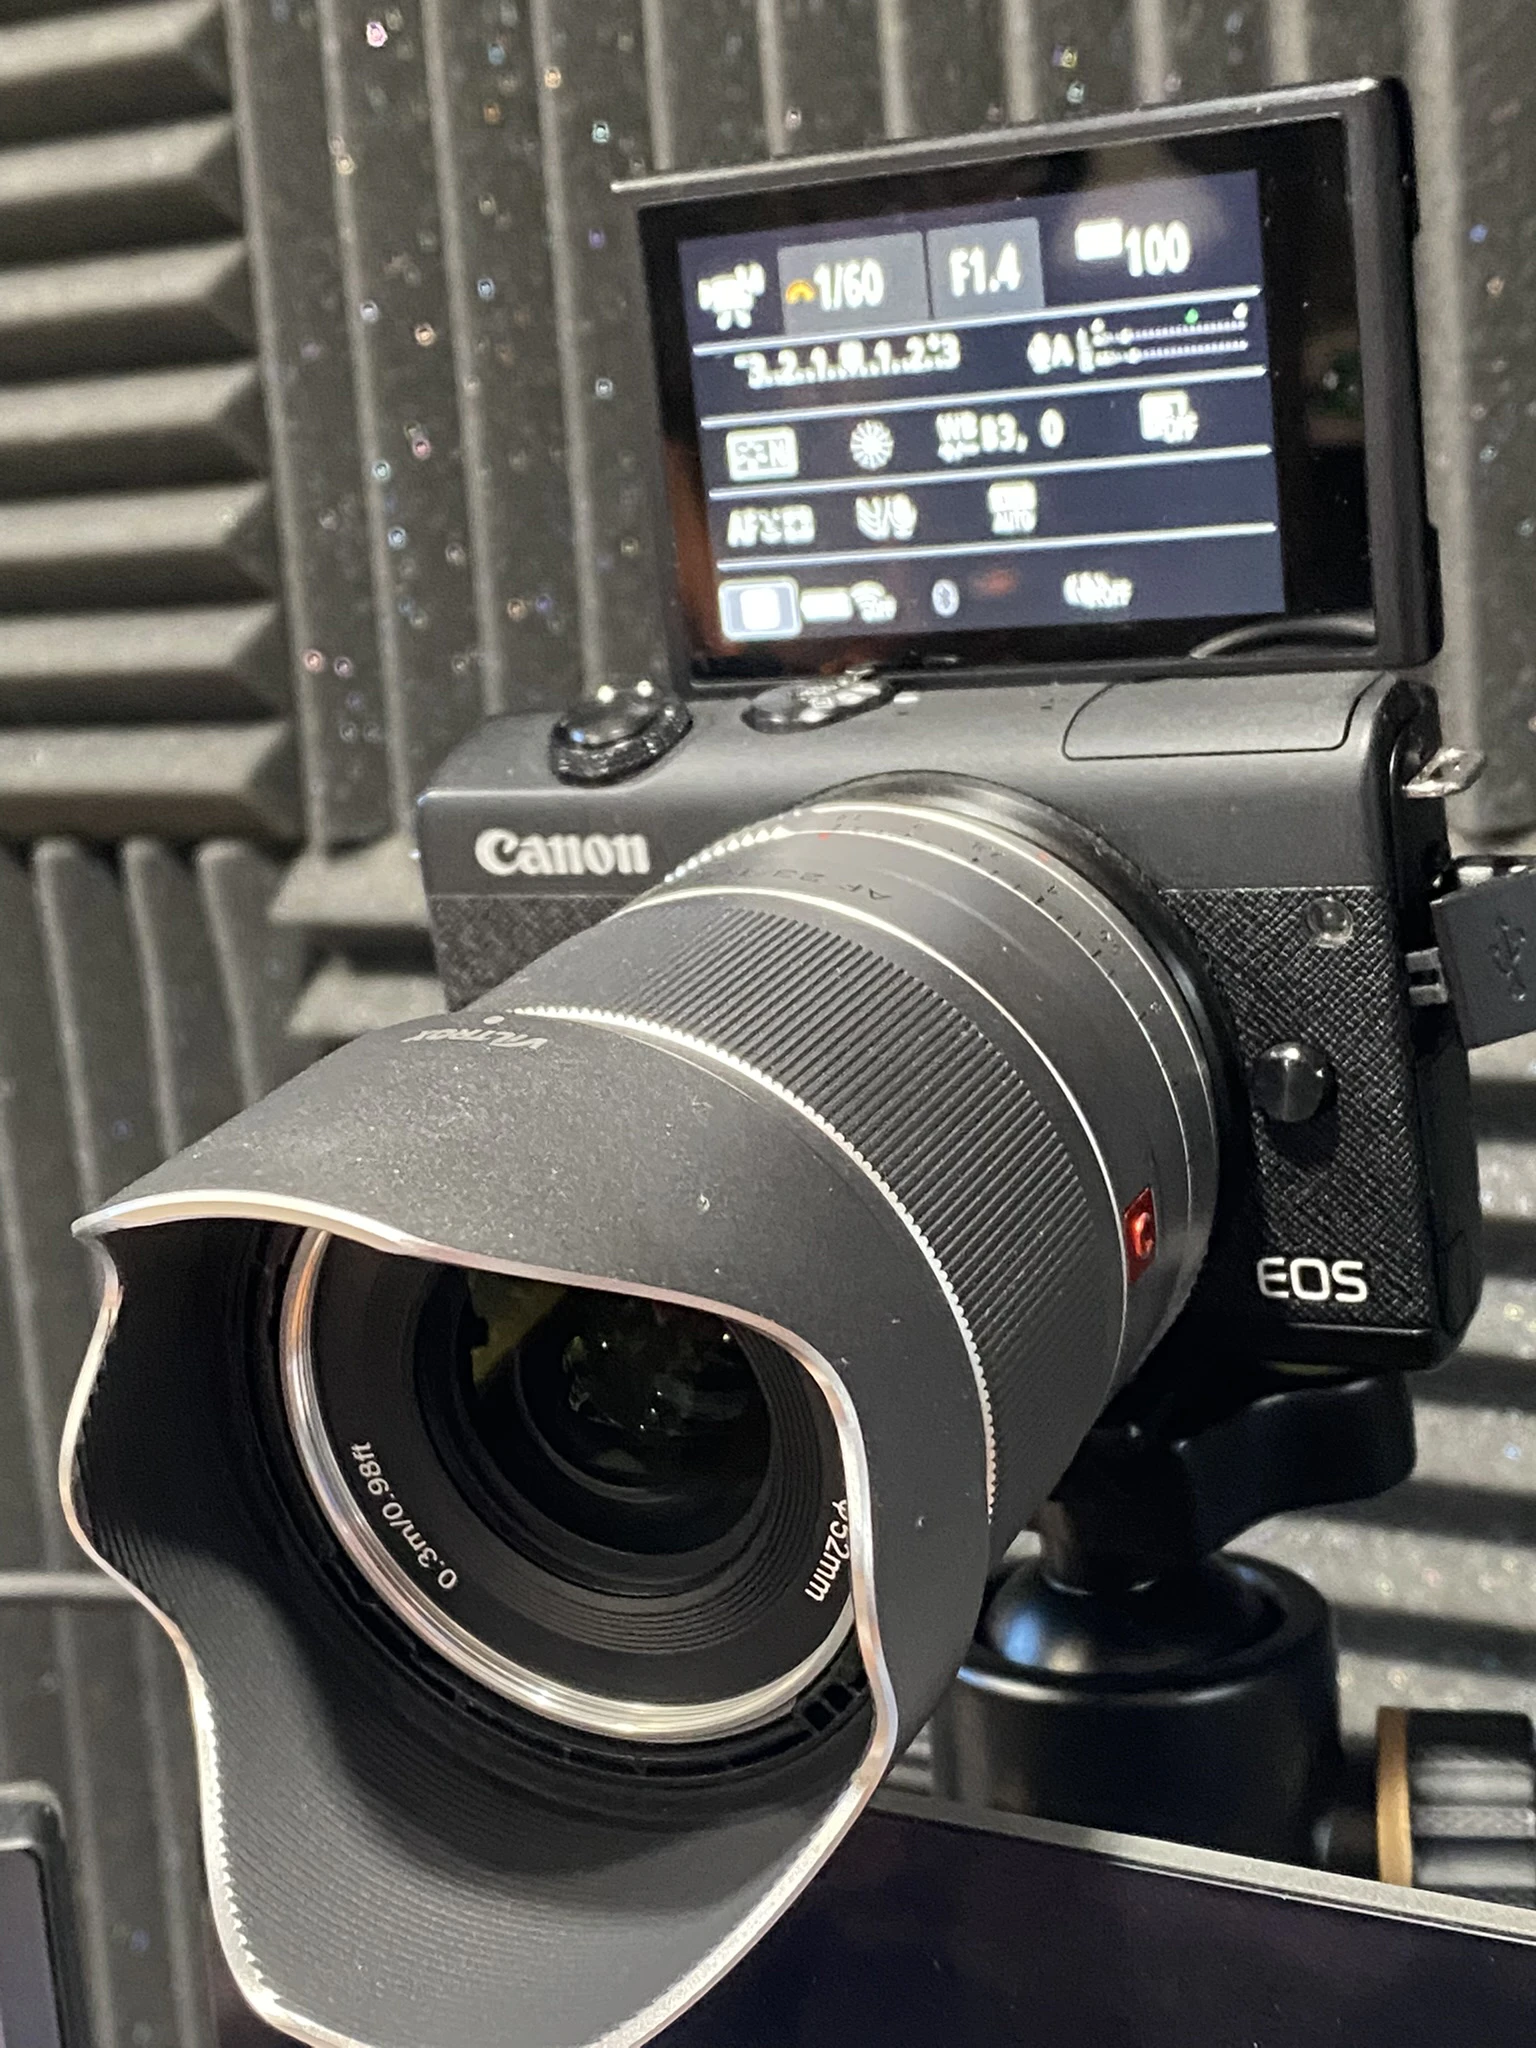 That’s when the Canon m200 caught my eye. At around $500 it had everything I needed, including the ability to add a high-quality adapter so I could take it’s EF-M mount and use our existing EF-mount lenses. I put that to good use over the Summer with our trip to Glacier National Park, and also documenting our family gatherings around my mom-in-law’s passing. I was able to capture some truly precious video with this setup and our Tamron 85mm f1.8 lens. I can’t watch this video without crying as I miss my mom-in-law and my wife and kids do intensely as well this time of year, as you can imagine. I’m really glad that I had the tools & skills to capture this gathering this summer.
I added a Viltrox 22mm f1.4 lens, which finally brought the live cam into cinema quality territory. My customers often comment about it!
It’s a capable — but cheap and lower quality — ”fast wide” prime lens. You can see some photos I shot with it here.
One small problem
The m200 was a great price, can shoot 4k video (though not as high-quality as the Sony alphas), has decent controls, and it looks pretty great in practice. It’s missing one thing that I really should have checked first: an external microphone input. I simply took for granted this inexplicably missing feature (even the old T5i has a mic input!) that turns out to be fairly important for some setups. I eventually solved for this by adding a mixer and XLR microphone upstream of the ATEM.
I think I dismissed it in part because I was planning to use the ATEM Mini Pro to route audio into, but like many things in life, it turned out to be more complicated than I thought.
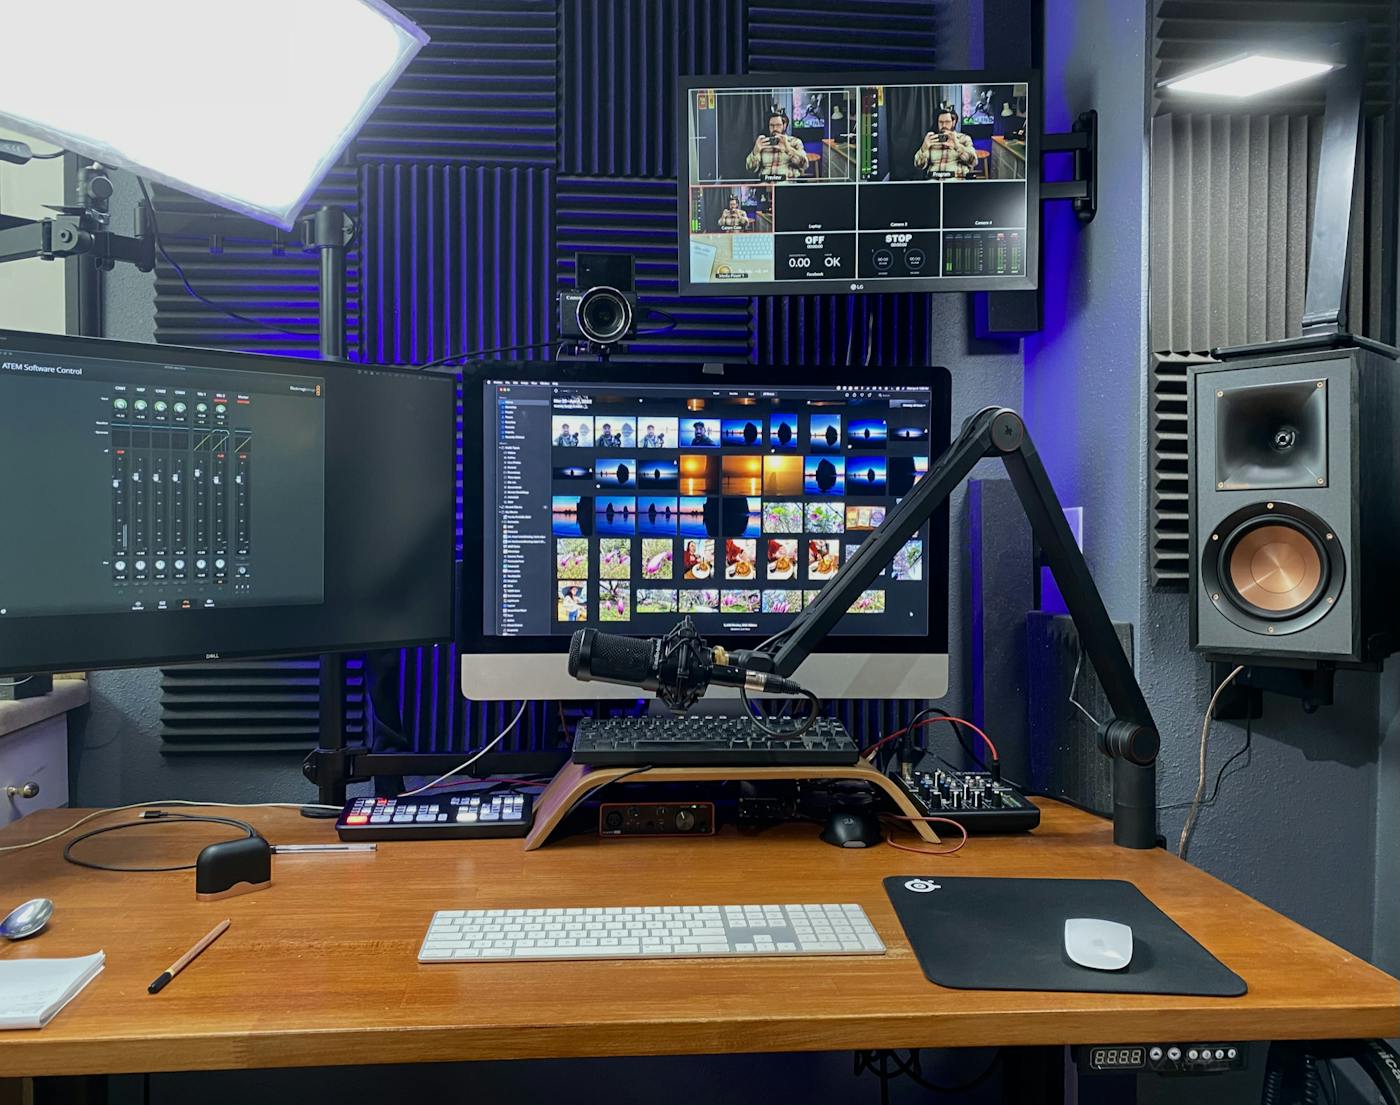
The Video Hub: ATEM Mini Pro
The ATEM Mini Pro is a 4-input HDMI switcher with many advanced features. It adds another layer of control and quality to the entire setup, that I can plug into any computer. I can route the audio from the XLR mic (now going through the Mackie mixer) into the mic port, and add delay (important with DSLR inputs) as well as fine-tune the audio mix for basically perfect audio.
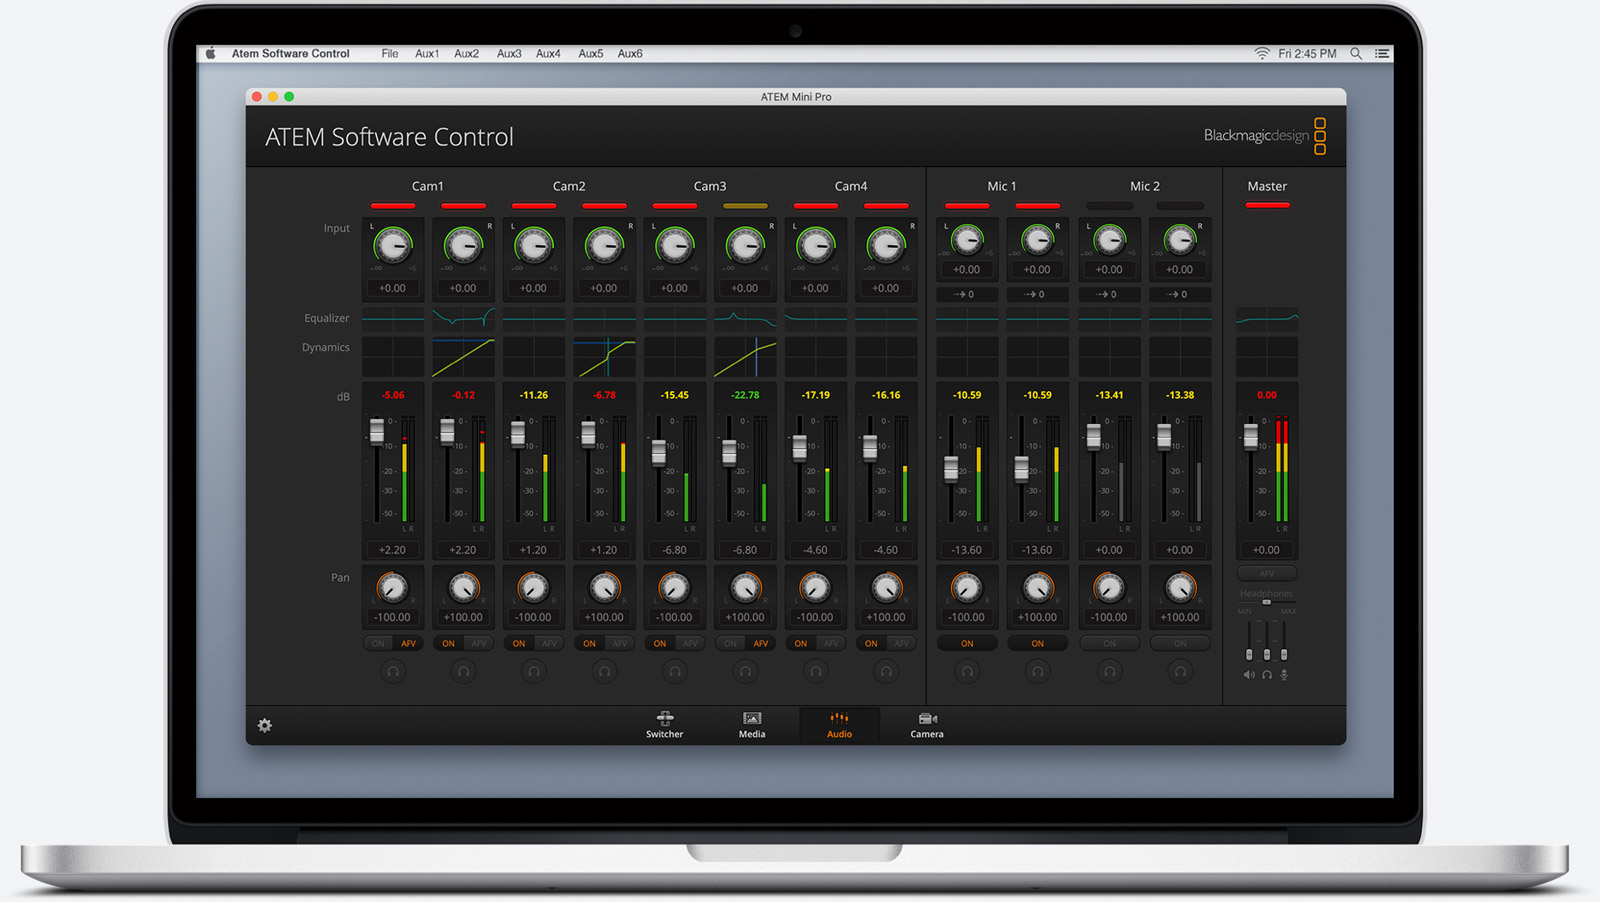
There are a few deficiencies that make it less than perfect: 1. Keying is pretty persnickety, and hard to grasp. 2. There is no video store, only still images. I can’t use it for playback, and am not going to buy a BMD Ultrastudio just for that. I have used other HDMI devices for video playout like an iPad or another computer connected to the ATEM. 3. There’s no simple way to do graphic overlays that are dynamic or animated. It’s an area I’m exploring.
I don’t love having to use OBS for things, it’s probably as close to a universal software-based standard for manipulating live video, but it just looks like a hassle. Once you’ve used real tools inside a live broadcast studio (or heck, just ProPresenter, which doesn’t really work with meeting software) you’re spoiled for life.
Lighting: Cheap, daylight color LEDs
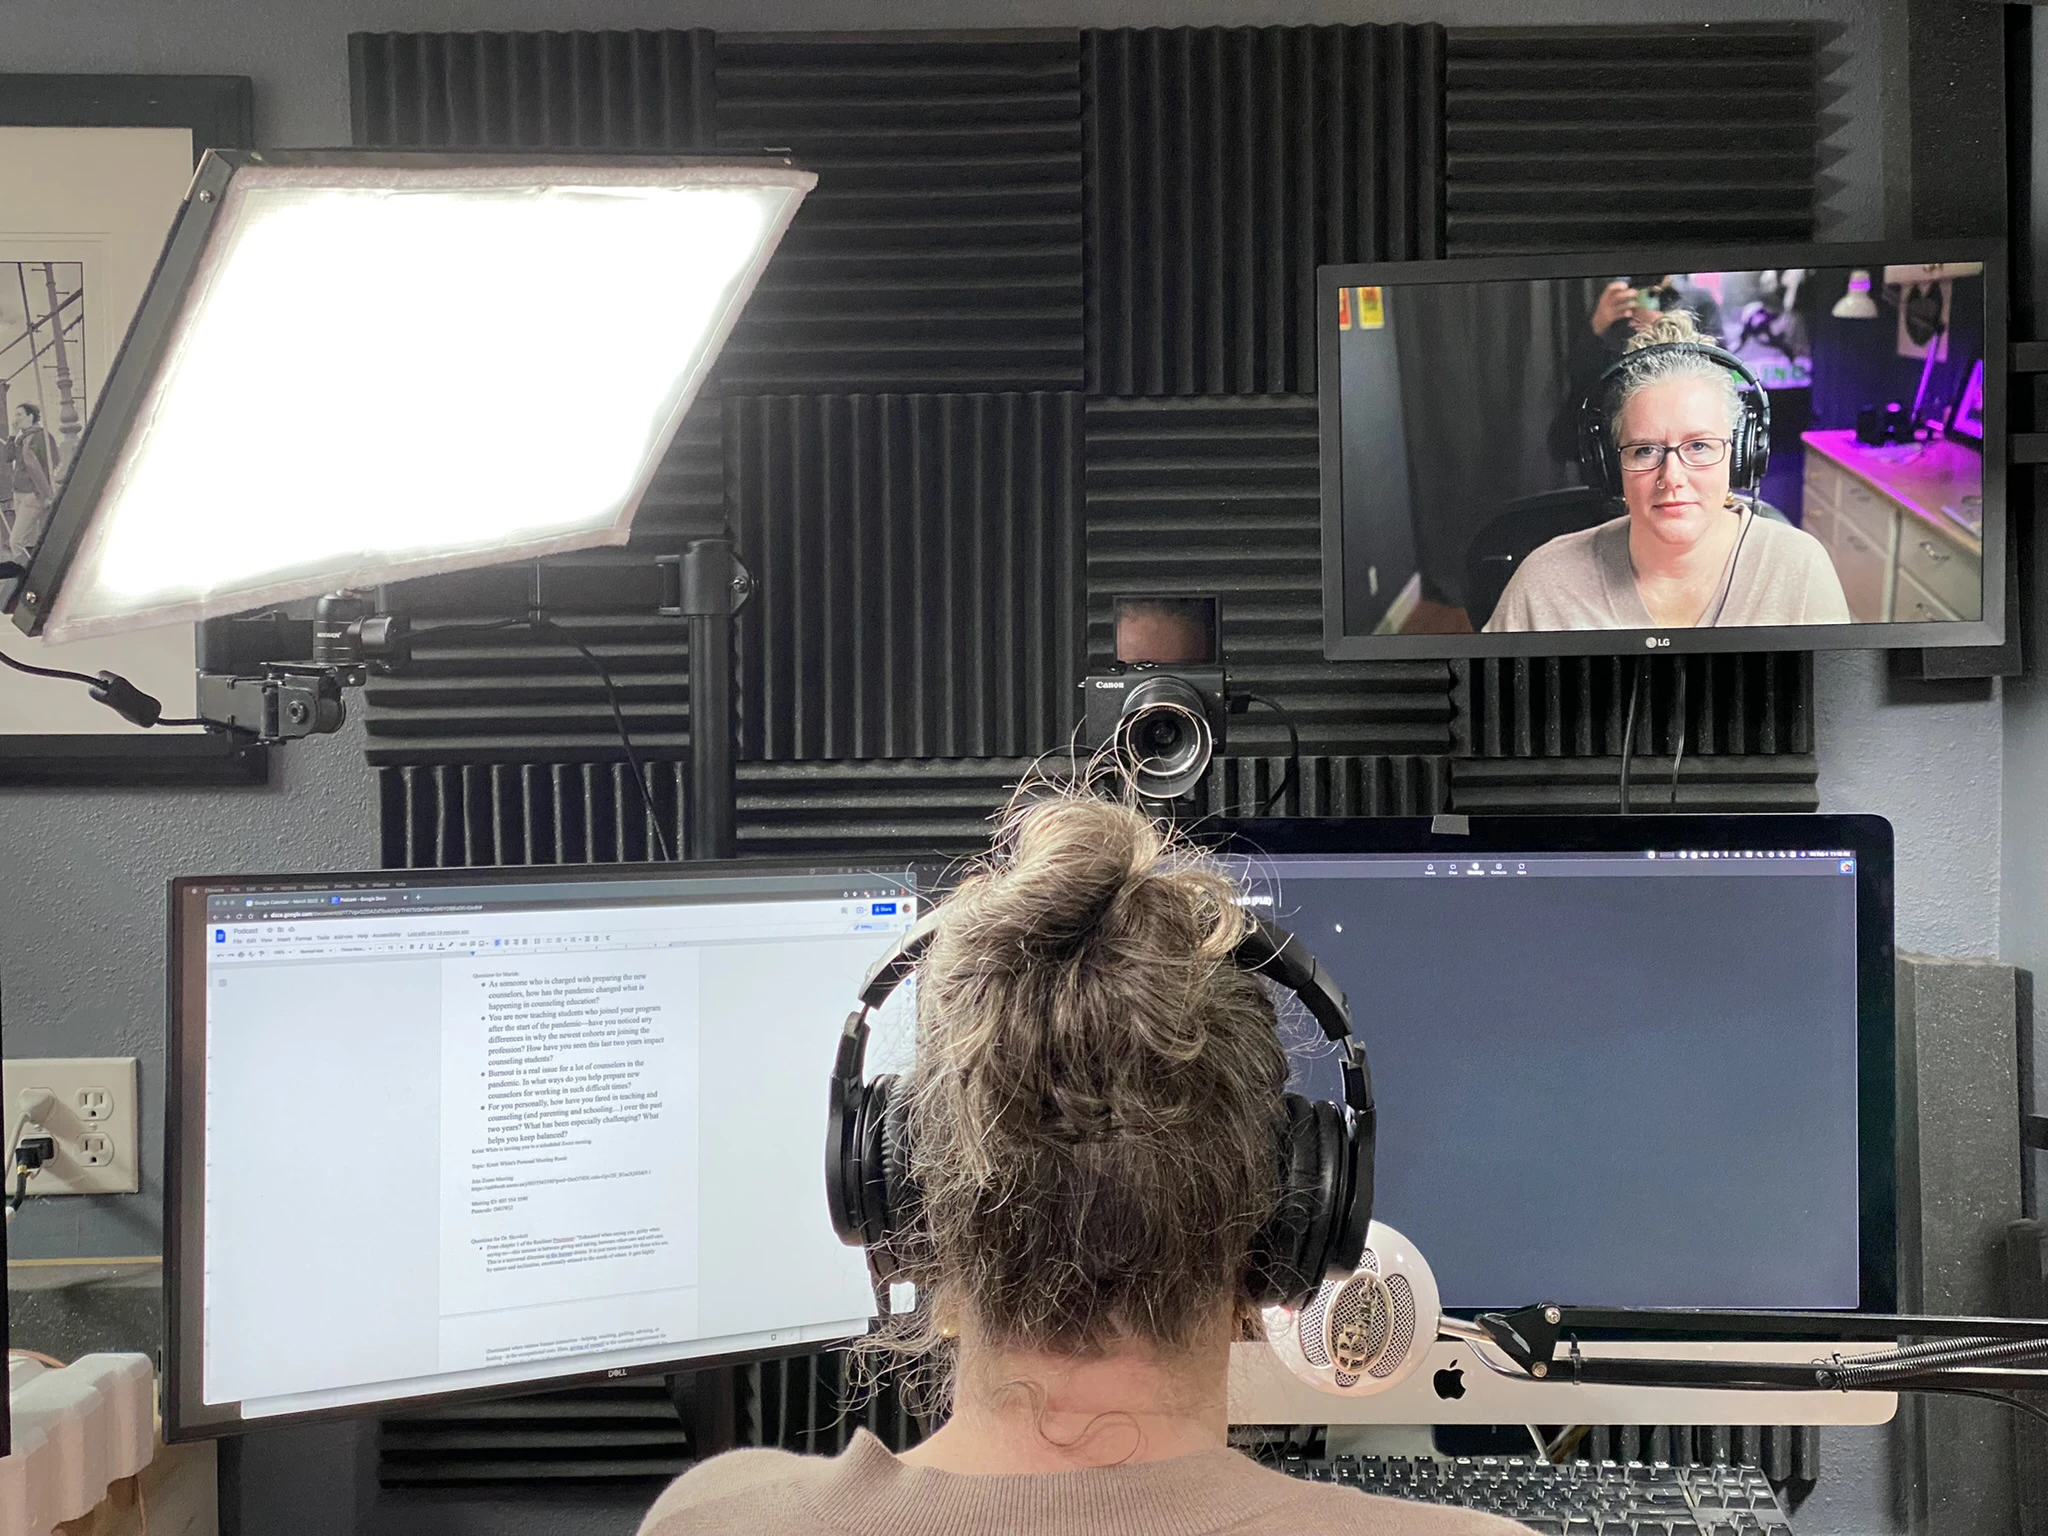
Kristi in the studio recording a session of her podcast
One thing I learned from doing video work was that managing color temperatures are essential. While it’s great to have nice, soft incandescent lights around, our screens and window lights are going to be cooler (5500K – 6500k). So, everything in the office is in that range, preventing any weird color clashes on my face. Background lamps or lighting can be incandescent or other RGB colors.
For the key lighting, I use a Neewer rollable LED panel, which you can see in the photo above. It’s big — about 2’ x 1’. Inspired by Caleb’s Ultimate Desk Setup above, I modified a monitor swing arm to hold a compact ball head mount to attach it. I run it at like 10-20% of its output capacity, which means a DIY softbox might be in the future with plenty of light to give. It was cheap, it puts out lots of light, and I chose a built-in 5600K color temperature to match all my other lighting. For some reason this item is not in production anymore, and I don’t see an equivalent from Neewer just yet. Get a dual-color LED panel for general use.
I have an old LED panel desk lamp for my fill light. I added a cheap 3-light track-light style setup to illuminate the room behind me, but I point one at my head from behind to act as a “hair light”. It adds some definition to the person in the frame to pull off the darker background and looks complete.
As of summer 2023, that’s about it for now; I have no plans to upgrade things unless something breaks (like this Focusrite Scarlett Solo USB interface, which, the 3-year warranty having just passed, is dying). That of course, was the point in investing in some “real” studio hardware: select individual components that are either cheap and replaceable, or rugged and will last years. Computers and software will come and go, but the studio is an investment in my remote work and content creation capabilities that I’ve really enjoyed using.
Read more about my Best Podcasting Tools For 2022.
💡Studio on!
I added some smart switches to let me turn a set of lights and equipment on with a scriptable Siri command. Homekit recognized them pretty easily and scripting them was pretty straightforward. I grouped them into a “scene” which lets me put them in different parts of the room. A small thing perhaps, but it reduces wear on the ATEM plug (why it has no power switch is mystifying) and, I’ll be honest, feels amazing to walk into the room and talk to my equipment!
Studio setup in action
Here you can see how this all comes together in this video I made for Contentful. The shoot went very quickly, looked and sounded great, and is what I get to use for everyday calls.